 EveryCutFile

4¼ × 5½ in side-fold card
4¼ × 5½ in (108 × 140 mm) folded
SVG · PNG · DXF · PDF · No account
Side fold at 108 mm. Folded: 108 × 140 mm.
33 designs
Folded cards and small paper boxes for a cut-and-score project in Design Space.
Free · No account · You can sell what you make
These card and box nets have separate fold guides. Every listed canvas fits within 292.1 by 292.1 mm (11.5 by 11.5 in), before any change of scale.
Design Space accepts SVG. SVG uploads have a 5,000-path limit; DXF upload is unavailable in the mobile apps.
Choosing a Cricut? Compare Joy 2, Joy Xtra, Explore 5, Maker 5 and Venture →
Buying on Black Friday? What each Cricut cost in last year’s sale →
Cricut or Silhouette? What each needs to open your SVG files →
Do you need Cricut Access to cut SVG files? →
4¼ × 5½ in (108 × 140 mm) folded
SVG · PNG · DXF · PDF · No account
Side fold at 108 mm. Folded: 108 × 140 mm.

5 × 7 in (127 × 178 mm) folded
SVG · PNG · DXF · PDF · No account
Side fold at 127 mm. Folded: 127 × 178 mm.

127 × 127 mm (5 × 5 in) folded
SVG · PNG · DXF · PDF · No account
Side fold at 127 mm. Folded: 127 × 127 mm.

100 × 90 mm (3⅞ × 3½ in) folded
SVG · PNG · DXF · PDF · No account
2 panels, each 100 × 90 mm, separated by score guides. Fold at the guides; this is a blank base without decoration.
90 × 60 mm (3½ × 2⅜ in) folded
SVG · PNG · DXF · PDF · No account
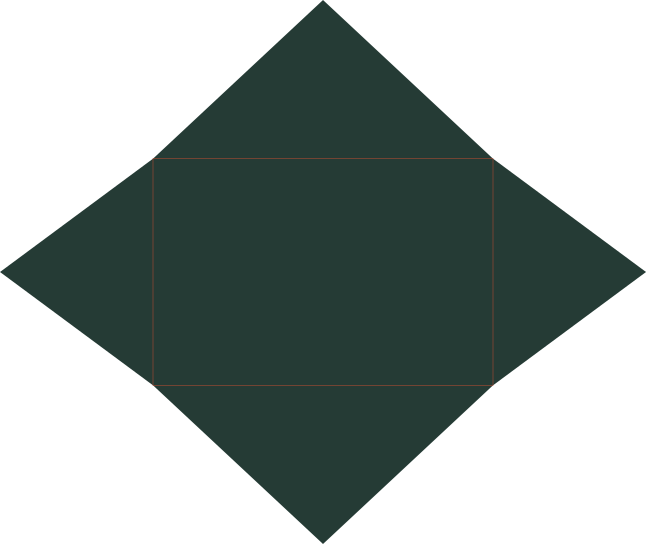
Gift card envelope, 90 × 60 mm. Fold the side flaps inward, then the bottom flap; join only the overlapping flap edges. The top flap closes last. Sizes are for thin paper; thick card makes the pocket a little smaller inside.
60 × 95 mm (2⅜ × 3¾ in) folded
SVG · PNG · DXF · PDF · No account
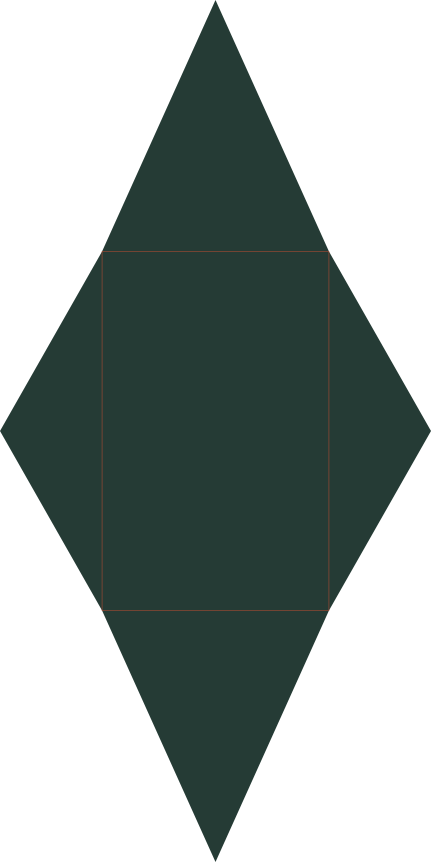
Seed packet envelope, 60 × 95 mm. Fold the side flaps inward, then the bottom flap; join only the overlapping flap edges. The top flap closes last. Sizes are for thin paper; thick card makes the pocket a little smaller inside.

100 × 140 mm (3⅞ × 5½ in)
SVG · PNG · DXF · PDF · No account
An aperture frame and matching back. Add your own transparent front and spacer; this file does not set a fill depth.

120 × 70 mm (4¾ × 2¾ in)
SVG · PNG · DXF · PDF · No account
A separate symmetric V-fold insert with narrow edge tabs. Center it across the fold of your own card, position both tabs symmetrically, then check that the card closes before attaching decoration.

40 × 35 mm (1⅝ × 1⅜ in)
SVG · PNG · DXF · PDF · No account
Four equal panels and an 8 mm join tab form an open parallelogram sleeve. Join the tab, flatten the sleeve and attach adjacent panels on opposite sides of a card fold. Check the closing movement before decorating.
45 × 45 mm (1¾ × 1¾ in) folded
SVG · PNG · DXF · PDF · No account
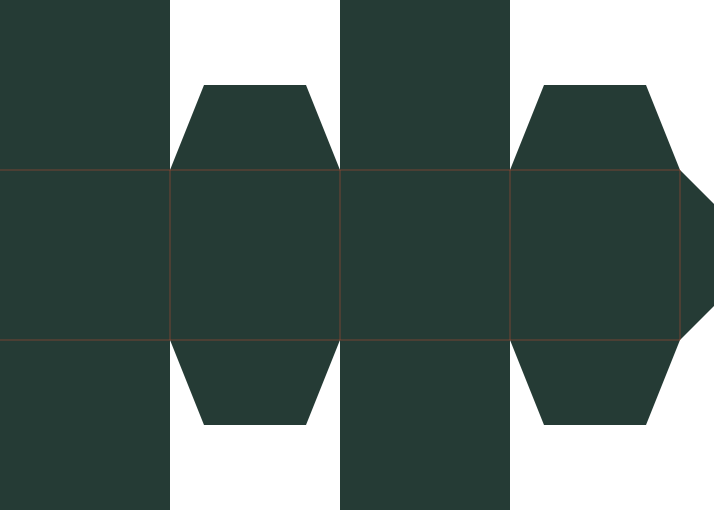
Cube favor glue-flap box, 45 × 45 mm. Four side panels with top and bottom glue flaps. Join the side tab, fold the short dust flaps inward, then glue the two full-depth rectangular flaps together at each end. Each major flap covers the opening exactly. Sizes are for thin card; thick card makes it a little smaller inside. The ends glue shut; they don’t tuck in.
35 × 80 mm (1⅜ × 3⅛ in) folded
SVG · PNG · DXF · PDF · No account
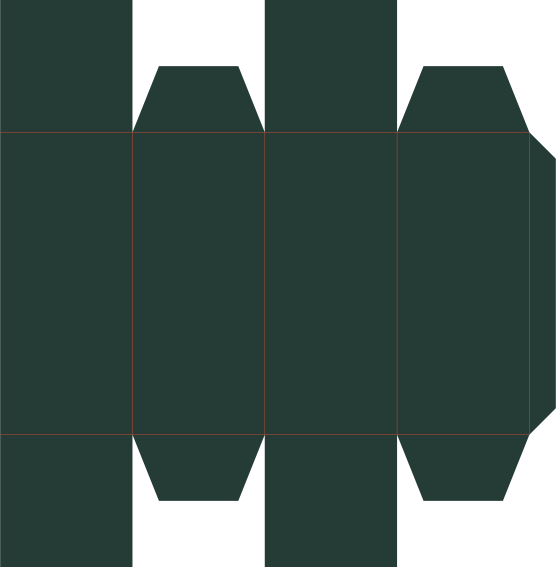
Tall favor glue-flap box, 35 × 80 mm. Four side panels with top and bottom glue flaps. Join the side tab, fold the short dust flaps inward, then glue the two full-depth rectangular flaps together at each end. Each major flap covers the opening exactly. Sizes are for thin card; thick card makes it a little smaller inside. The ends glue shut; they don’t tuck in.
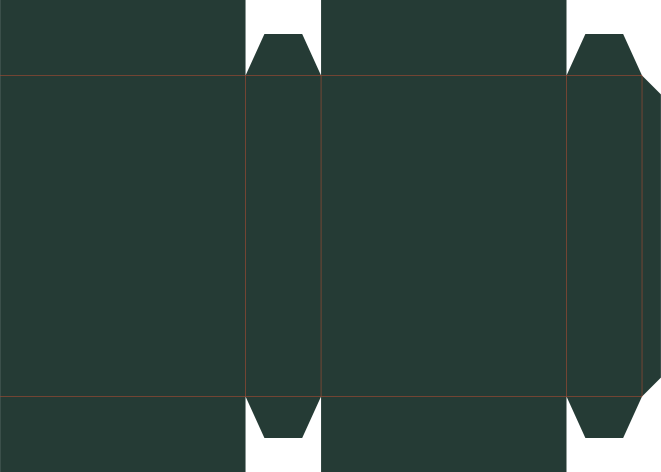
65 × 85 mm (2½ × 3⅜ in) folded
SVG · PNG · DXF · PDF · No account
Tea sachet glue-flap box, 65 × 85 mm. Four side panels with top and bottom glue flaps. Join the side tab, fold the short dust flaps inward, then glue the two full-depth rectangular flaps together at each end. Each major flap covers the opening exactly. Sizes are for thin card; thick card makes it a little smaller inside. The ends glue shut; they don’t tuck in.
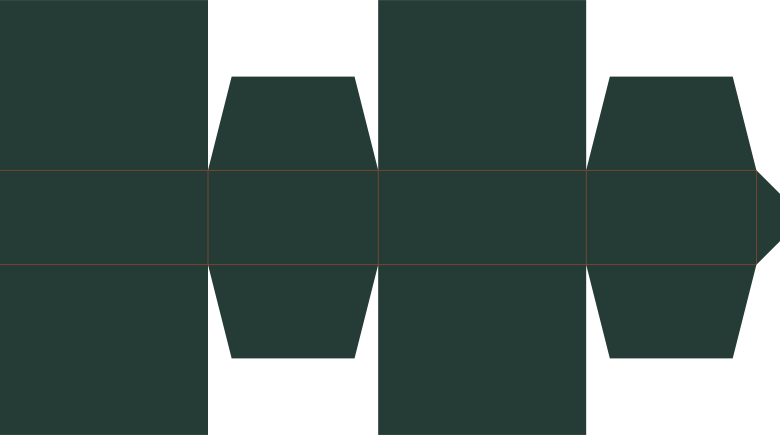
55 × 25 mm (2⅛ × 1 in) folded
SVG · PNG · DXF · PDF · No account
Small jewelry glue-flap box, 55 × 25 mm. Four side panels with top and bottom glue flaps. Join the side tab, fold the short dust flaps inward, then glue the two full-depth rectangular flaps together at each end. Each major flap covers the opening exactly. Sizes are for thin card; thick card makes it a little smaller inside. The ends glue shut; they don’t tuck in.

75 × 75 mm (3 × 3 in) folded
SVG · PNG · DXF · PDF · No account
Square open tray, 75 × 75 mm. An open tray net without integral glue tabs. Fold the walls up and join the corner seams with your chosen backing strips. The template does not include seam allowance.

120 × 45 mm (4¾ × 1¾ in) folded
SVG · PNG · DXF · PDF · No account
Long open tray, 120 × 45 mm. An open tray net without integral glue tabs. Fold the walls up and join the corner seams with your chosen backing strips. The template does not include seam allowance.

110 × 80 mm (4⅜ × 3⅛ in) folded
SVG · PNG · DXF · PDF · No account
Shallow card open tray, 110 × 80 mm. An open tray net without integral glue tabs. Fold the walls up and join the corner seams with your chosen backing strips. The template does not include seam allowance.

50 × 40 mm (2 × 1⅝ in) folded
SVG · PNG · DXF · PDF · No account
Small favor open tray, 50 × 40 mm. An open tray net without integral glue tabs. Fold the walls up and join the corner seams with your chosen backing strips. The template does not include seam allowance.

65 × 40 mm (2½ × 1⅝ in) folded
SVG · PNG · DXF · PDF · No account
Matchbox tray and sleeve, 65 × 40 mm. An open tray and a separate wrapping sleeve. The sleeve is 1 mm bigger than the tray on each side, with a 10 mm overlap. Adjust it for your material and joins.

95 × 65 mm (3¾ × 2½ in) folded
SVG · PNG · DXF · PDF · No account
Drawer tray and sleeve, 95 × 65 mm. An open tray and a separate wrapping sleeve. The sleeve is 1 mm bigger than the tray on each side, with a 10 mm overlap. Adjust it for your material and joins.
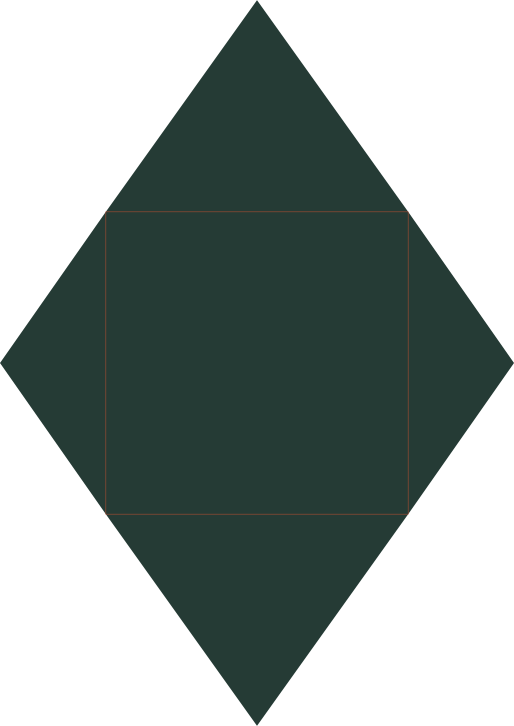
80 × 80 mm (3⅛ × 3⅛ in) folded
SVG · PNG · DXF · PDF · No account
Square gift envelope box, 80 × 80 mm. Fold the side flaps inward, then the bottom flap; the flaps meet edge to edge without overlapping, so tape the seams. The top flap closes last. Sizes are for thin paper; thick card makes the pocket a little smaller inside.

60 × 60 mm (2⅜ × 2⅜ in) folded
SVG · PNG · DXF · PDF · No account
Fold the four triangles up around the square base. Their side edges meet at the apex. Join adjoining edges with backing strips; glue tabs are not included.

85 × 85 mm (3⅜ × 3⅜ in) folded
SVG · PNG · DXF · PDF · No account
An open square tapered container, 50 mm at the base and 85 mm at the rim, with 95 mm tall. Fold the four sides up and join their edges with backing strips; this net has no integral glue tabs.

90 × 90 mm (3½ × 3½ in) folded
SVG · PNG · DXF · PDF · No account
An open square tapered container, 65 mm at the base and 90 mm at the rim, with 65 mm tall. Fold the four sides up and join their edges with backing strips; this net has no integral glue tabs.

70 × 90 mm (2¾ × 3½ in) folded
SVG · PNG · DXF · PDF · No account
Treat cone, 70 × 90 mm. Bring the two straight edges together to form the cone. Use a separate backing strip at the seam; this exact sector includes no overlap. The rim remains open.

80 × 69 mm (3⅛ × 2¾ in) folded
SVG · PNG · DXF · PDF · No account
Hexagonal box base, 80 × 69 mm. Fold six rectangular walls around the hexagonal base. Join the corners with separate backing strips. For a lid, allow clearance for your measured material thickness; no universal clearance is assumed.

84 × 73 mm (3¼ × 2⅞ in) folded
SVG · PNG · DXF · PDF · No account
Hexagonal lid blank, 84 × 73 mm. Fold six rectangular walls around the hexagonal base. Join the corners with separate backing strips. For a lid, allow clearance for your measured material thickness; no universal clearance is assumed.
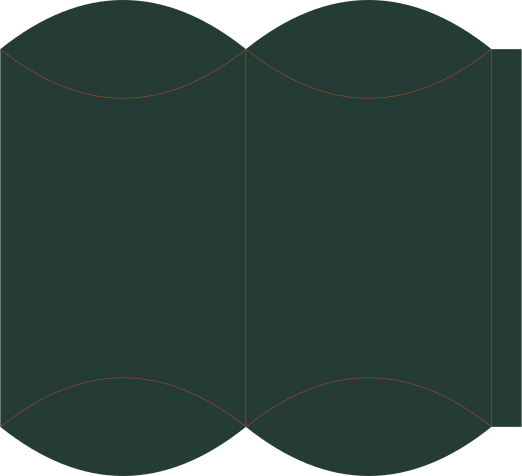
138 × 126 mm (5⅜ × 5 in)
SVG · PNG · DXF · PDF · No account
Curve the two broad faces into a sleeve, join the narrow side tab and fold the curved end flaps inward. Flat face width is 65 mm and central length is 100 mm; the formed thickness and usable finished length depend on the bend.
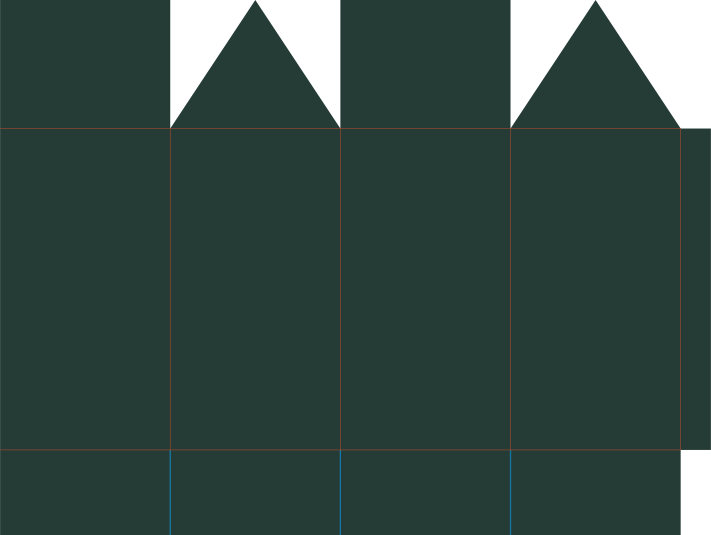
45 × 45 mm (1¾ × 1¾ in) folded
SVG · PNG · DXF · PDF · No account
Milk carton gift box, 45 × 45 mm. Fold four body panels into a tube and join the side tab. Close the short bottom flaps with a separate backing square. Bring the two broad top flaps together over the triangular ends; glue or clip the roof seam. No handle or locking catch is supplied.
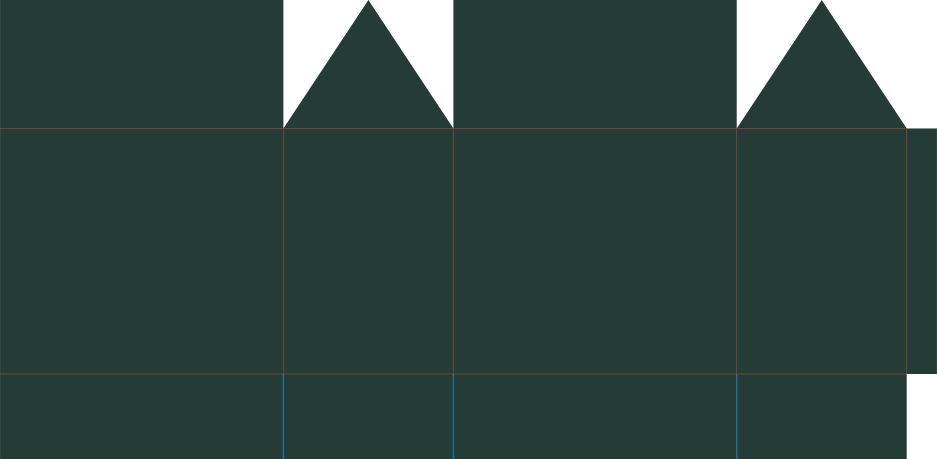
75 × 45 mm (3 × 1¾ in) folded
SVG · PNG · DXF · PDF · No account
Gable gift carton, 75 × 45 mm. Fold four body panels into a tube and join the side tab. Close the short bottom flaps with a separate backing square. Bring the two broad top flaps together over the triangular ends; glue or clip the roof seam. No handle or locking catch is supplied.

65 × 65 mm (2½ × 2½ in) folded
SVG · PNG · DXF · PDF · No account
Explosion box base, 65 × 65 mm. An open tray net without integral glue tabs. Fold the walls up and join the corner seams with your chosen backing strips. The template does not include seam allowance.

80 × 65 mm (3⅛ × 2½ in) folded
SVG · PNG · DXF · PDF · No account
Easter basket base, 80 × 65 mm. An open tray net without integral glue tabs. Fold the walls up and join the corner seams with your chosen backing strips. The template does not include seam allowance.
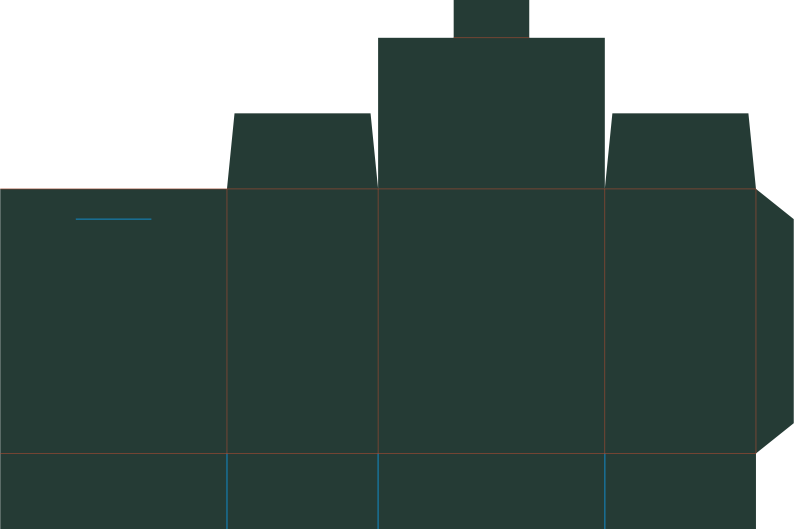
60 × 70 mm (2⅜ × 2¾ in) folded
SVG · PNG · DXF · PDF · No account
Four body panels form a 60 × 40 × 70 mm box. The back lid crosses the 40 mm depth; its 20 mm tongue enters the front slit. Fold the lid tongue, join the side seam and glue the bottom flaps. For thick card, cut the slit a little wider than the tongue.

80 × 60 mm (3⅛ × 2⅜ in) folded
SVG · PNG · DXF · PDF · No account
A separate tray base and shallow lid. The lid is 2 mm wider and deeper than the base so it slides on; add more for thick card.
Browse the whole library with more filters, these 33 first →
Choose paper or cardstock suited to your model and tool. Set the red fold lines to Score (or fold them by hand); the blue slits stay as cuts.
Cricut gives an 11.5 by 11.5 in cutting area on a 12 by 12 in mat. Smaller machines and other mats have their own cutting area. Filter by the flat template size, not the finished box.
These downloads are vector cut files. To print added artwork first, prepare Print Then Cut in Design Space. Its area depends on machine, page size and design proportions; the cutting-mat limit is not a Print Then Cut limit.
From the maker’s documentation: Cricut: image upload instructions, Cricut: change the mat or material size, Cricut: cardstock instructions, Cricut: Print Then Cut, Cricut: Print Then Cut area.